Over the past few weeks, I’ve been updating some of my projects to latest standards, adding in Github Actions where appropriate etc. Most recently I’ve setup a template repository in Github.
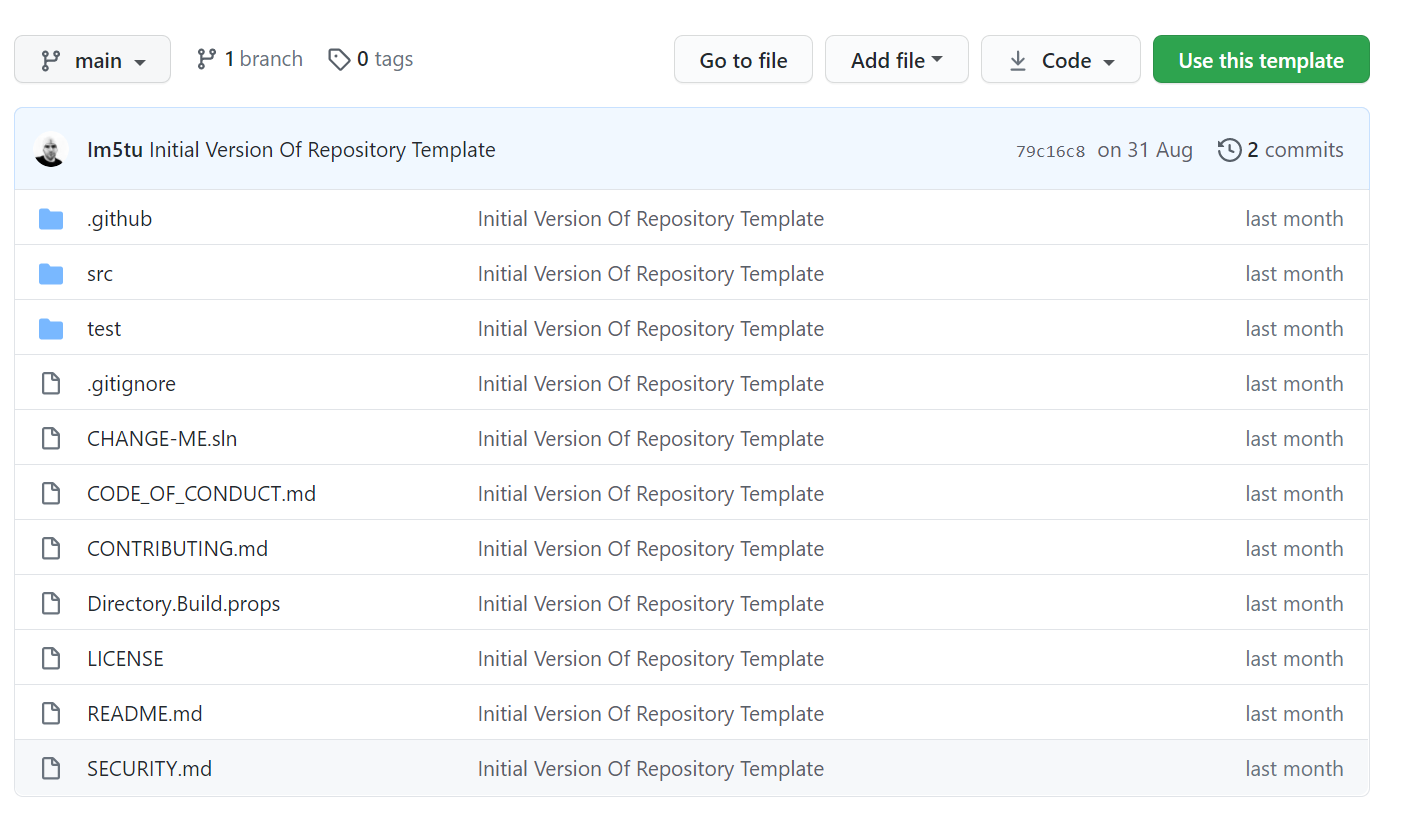
For those who aren’t familiar with a Github repository template, it allows you to initialize a new Github repo with what ever files are inside of the template repository at the time of creation. In this post, I am going to walk through some of the files that I have created for my template repository. Here is an overview of what the template looks like at the time of writing:
Community Files
The first area that I am going to address is the community files. These are files that directly contribute to the community profile. This is a series of standards set by the community that help foster diversity, inclusion & collaboration within a project. When creating the repository there are a number of things that need to be updated, so I’ve placed these in the readme source (as a comment) with instructions on what to do. This is just to put things like the project name in the correct place in the contributing guide.
ReadMe
The ReadMe file is likely the first thing that your contributors and consumers are going to see about the project. It’s important to get across all of the critical information critically and efficiently. Here are the sections that I eventually decided on (based on this template):
- Badges
- Getting Started
- Prerequisites
- Installation
- Usage
- Roadmap
- Contributing
- Security
- Acknowledgements
At the top of the readme, I’ve added in the seemingly standard swag badges showing the following information at a glance:
- The license type
- The current Github Release
- CI Pipeline status
- Release Pipeline status
- Contributors
The Getting Started section is the most important part of the readme, as that is likely the thing that your consumers will do the most. Therefore, it’s important to keep the setup instructions as simple and clear as possible. I thoroughly recommend that you spin up a vm/use a different machine to verify that the instructions work as you intend.
The road map section lets the community know that there is a future for the project and what sort of things that you are looking to implement. You never know when a person or company may sponsor you to do a feature or what ideas it may spawn from there.
The contribution section tells users what you would expect from a contribution. It’s good to link through to a specific contribution guide if you have one so the information is in one place. You should also call out any security related contributions as well, including how they should be handled.
Last, but by no means least is the acknowledgements section. This just shows some appreciation for the community who’ve contributed, key technologies that have been used or just a nod to say thank you. Linking to the technology/personal profile of that which you are acknowledging is a great step to a better community.
Contribution Guide
If you’re lucky enough to have people that want to contribute to your project, it’s important to give guidance on how you would like the contribution to happen. This may be always creating an issue first for discussion, for example. The standard approach to communicating this on Github is to use a CONTRIBUTING.md file placed in the root of the repository. In this file, you should give details on:
- Where to find things to contribute towards, eg: good first issues
- What to do when submitting a bug
- Setting up the project
- Creating a pull request
Code of Conduct
As your project grows, it’s an unfortunate fact that you will have trolls and people generally not being very nice. We all wish that people would just be nice and courteous to one another, but as that doesn’t happen, we need a code of conduct that applies across the project including the project owners. By having a CODE_OF_CONDUCT.md in your repository root, you are setting the standards that people should adhere to when interacting in your community. I strongly suggest that you take a look at the Contributor Covenant for more information here, including a template that you can use. How you respond to those who breach your code of conduct is up to you, and may vary depending on the severity of the breach.
License
A license simply tells your consumers what they are and are not allowed to do with the project, including whether it’s free to use for commercial use. For help picking the right license for you, head over to Choose A License.
Other
You can also setup other common files to help automate certain actions for yourself or your contributors. A few examples:
.github/pull_request_template.md- A template for all pull requests. This could include things like a checklist to ensure that certain standards are met..github/ISSUE_TEMPLATE/*.md- Files that are included underISSUE_TEMPLATEshow up when you create a new issue. You can template the format for various issues like bugs vs feature requests. This can automatically include labels.SECURITY.md- An important document that tells contributors and researchers what to do when a security issue is found.
Initialisation a repository from a template
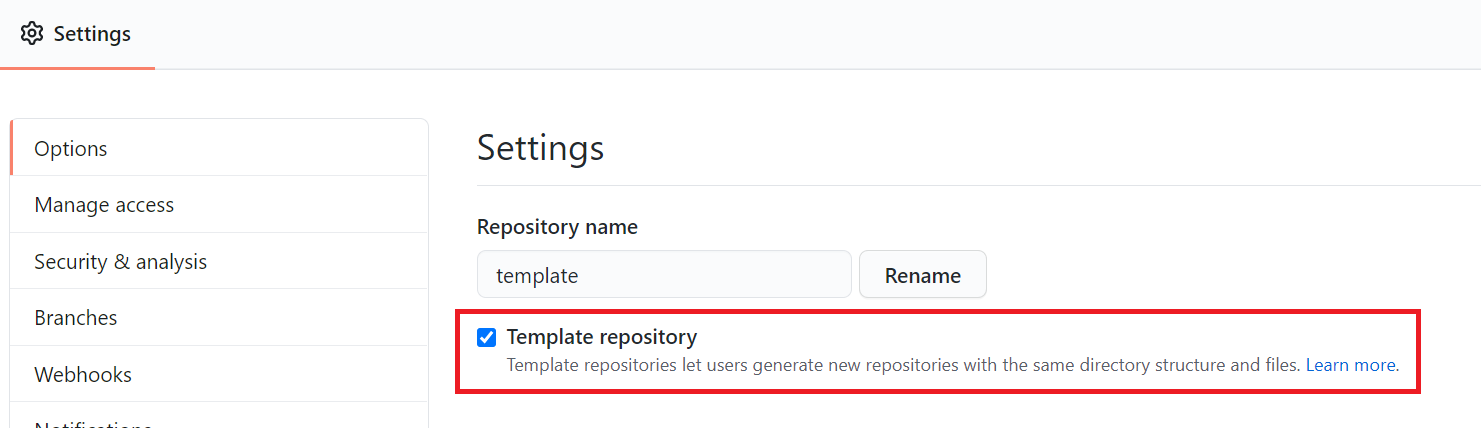
Now that we’ve gone over the files that I’ve placed inside of my repository, we probably want to see how to use it. Firstly, we need to setup the template repository as a template. To do this, we need to go to the settings page and select the Template repository option, as shown here:
Once this is done, when you create a new repository, you can select the template as the source for this repository:
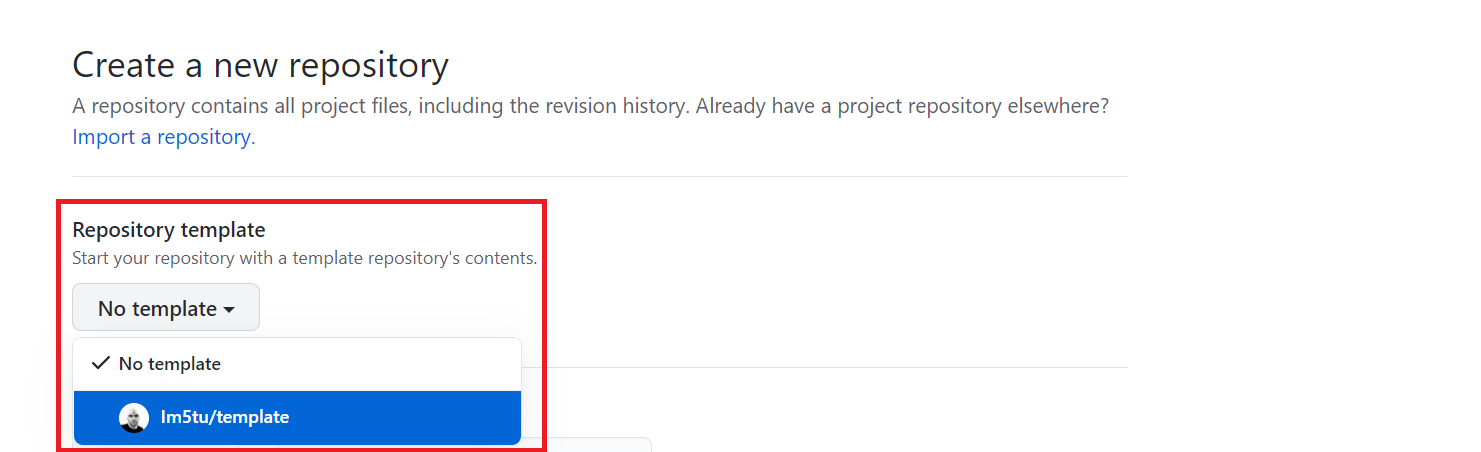
After you click create, Github clones the current files from the template repository into your new repository, ready for you to build greatness!
That’s all there is to it, happy templating!